This page is generic and related to ubiFLEET & ubiSMART products
This page allows you to create, delete and manage entities.
Definition: an entity is anything that can be linked to a device and that you want to monitor.
Thus, an entity can be a driver, a vehicle, a trailer, an engine, a wagon, a boat, etc.
The objective is to make the name of the entity appear instead of the name of the device in order to link the data directly to the entity, especially when there is a temporary link (a mobile device can be used by different drivers, a driver can use different vehicles or trailers,…).
The link can be
- automatically generated, i.e. via LOGIN on a mobile device.
- fixed in the database, i.e. a telematics device mounted on a vehicle generates a frozen link.
- temporarily generated by the Ubidata T&T, but this is a custom function. Please contact your project manager to get more information about this feature.

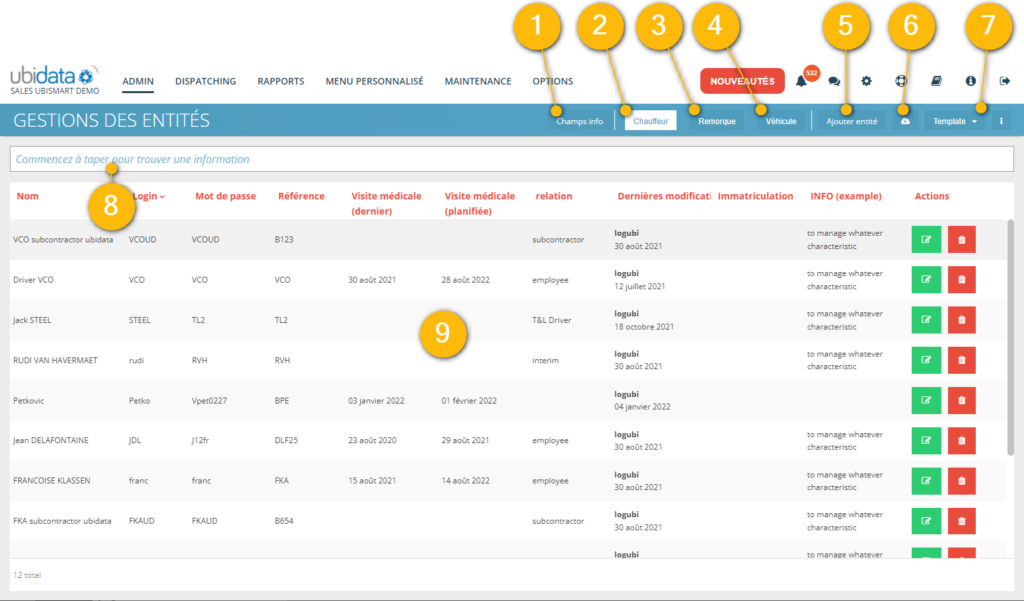
The Entity Management page includes the following elements:
Action buttons in the title bar:
- (1) Information fields
- (2) List of drivers
- (3) Trailer list
- (4) List of vehicles
- (5) Add an entity
- (6) Export button
- (7) Template button + column selector
- (8) Search bar
- (9) List in tabular format
Information field
An information field is a set of useful information for an entity. These are specific to you and you define them according to your needs.
By default the system proposes 4 fields of information for a DRIVER, necessary for the proper functioning of the project:
- Name,
- Login,
- Password
- and reference
while vehicles, trailers… have 2 information fields:
- Name
- and reference
You can add as many information fields as make sense for your project.
For example, you can add medical visit dates for DRIVERS. Just click on the Information fields button to access the information fields management screen.
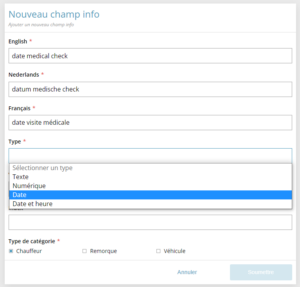
Clicking on “Add information fields”, opens a new screen to encode a new type of information such as ‘date of last medical visit’.
Fill in the column titles with the information in EN – FR – NL. Then indicate the type of data to be filled in (Text, Numeric, Date, Date and Time).
In some cases, it is interesting to encode a default value. This field can remain empty.
The index will indicate the place in the summary.
You can choose to associate this information field to 1 or more entities.

To return to the Entity Management screen, you must click in the upper right corner.
Examples of information fields that might be useful to you:
For a driver:
- Date of medical examination
- type of employment contract (interim / subcontractor)
- mobile phone number
- type of driver’s license
- driver’s license number and validity
- etc.

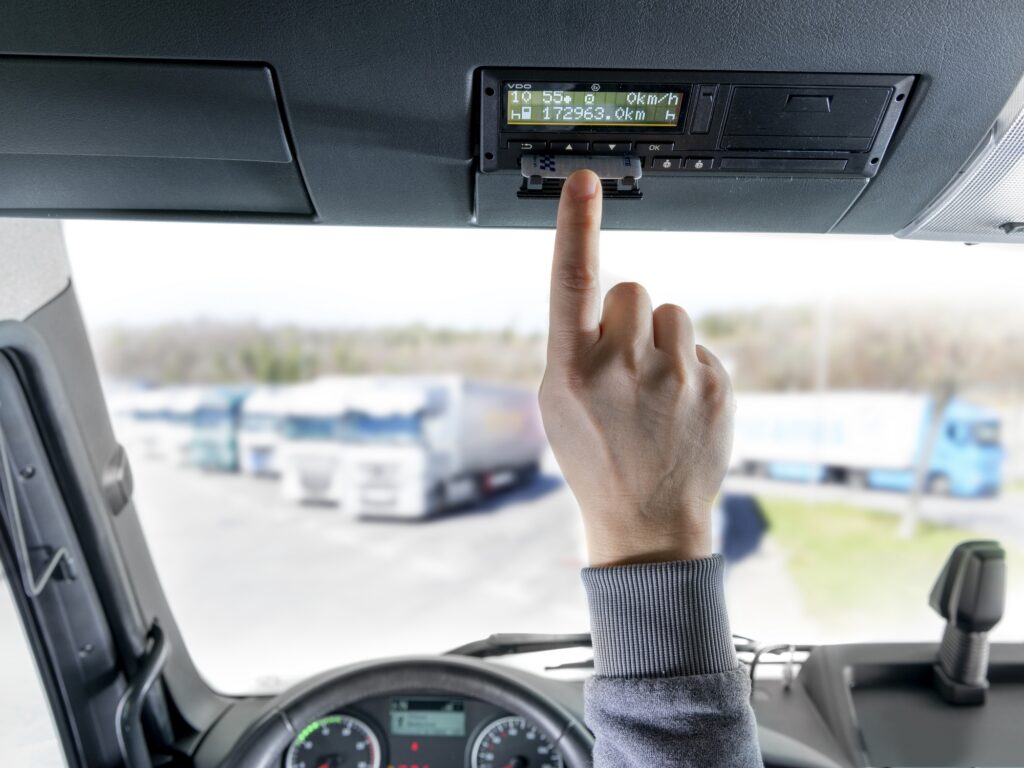
In the case of a driver, if your project allows a link to the tachograph, the system can display the card number and the expiry date!
For a vehicle or a trailer:
- plate number
- date of last service
- date of next maintenance
- date of technical inspection
- model
- make
- type (van / carrier)
- etc.
Driver
This table lists the drivers for your project. A DRIVER can be identified on the 2 supported device types:
- mobile device via ubiSMART
- telematics device via ubiFLEET
It is absolutely necessary to create an entity of type DRIVER if you use the ubiSMART mobile application, otherwise your driver will not be able to identify himself in the system.
If your application requires a password, be sure to pass the information to the driver. The login and password will need to be entered by the driver on their mobile device in order to create their schedule.
In the edit and create forms, you can assign a tacho card and set its expiration date. Please contact your project manager for more information.
A driver can also log into a ubiFLEET project via an ID tag on a telematics box.
Trailer
As in the DRIVER section, you will find here the list of TRAILER entities.
Besides the information field “Last modified by”, there are at least 2 other information fields: Name and reference.
Vehicle
As in the DRIVER and TRAILER sections, you will find here the list of entities of the As in the DRIVER section, you will find here the list of entities VEHICLES.
In addition to the information field “Last modified by”, there are at least 2 other information fields: Name and reference.
Add an entity
If you want to add a new entity, you have to click on the button ‘Add entity’. A new screen appears:

You must first choose the type of entity you wish to add.
Depending on the type of entity, you will need to fill in the different information fields before clicking Submit.
Warning: The Login/Password/Reference fields are used for integration purposes. Be careful when making changes to them.
Export
By clicking on this button, you will be able to export via Excel either the current page you are viewing or all filtered information. The latter means that only the data of the displayed columns will be exported (if you have hidden some columns, the data of these columns will not be exported).
Templates / Layout
Please read the corresponding articles:
Search bar
lease read the corresponding articles:
Table
The table shows you all the information available entity by entity according to your choice, and the information fields you have chosen to encode and display.
